What happens when you over- or under-proof bread
If your bread dough hasn't been proofed for a sufficient amount of time, you'll notice the difference once it goes into the oven, according to Nathan Myhrvold. "An overproofed dough won't rise much during baking, and the same goes for an underproofed one," Myhrvold explains. "Overproofed doughs collapse because of a weakened gluten structure and too much gas, while underproofed doughs lack enough carbon dioxide to expand properly."
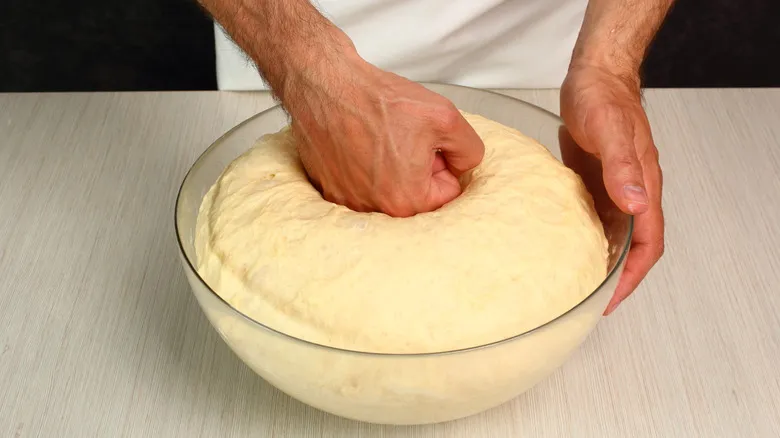
Fixing underproofed bread is straightforward: as long as it hasn't been baked yet, simply allow it to proof longer until the finger test indicates it's ready. Surprisingly, Myhrvold notes that you can also salvage overproofed bread. "Using a method we refer to as 'Dough CPR,' we managed to revive the same batch of dough up to 10 times without significant loss in quality."
Don't worry—this rescue method is quite simple. Overproofed dough contains excess gas, so all you need to do is flatten or punch it down to release some of that gas. Afterward, reshape the dough, return it to the proofing container, and let it rise again, ideally avoiding overproofing this time. This technique is often referred to as "knocking back" the dough.
Ways to make sure you're proofing bread right
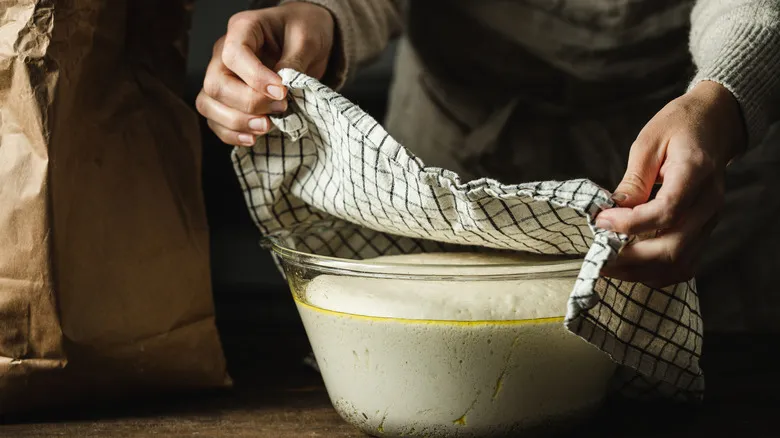
To ensure your bread is perfectly proofed, pay close attention to the environment in which you're proofing it. The ideal temperature range is between 75 and 80 degrees Fahrenheit; this warmth encourages the yeast to ferment quickly without risking its death, which occurs around 90 degrees Fahrenheit. However, some bakers prefer to proof in cooler conditions for convenience (such as overnight proofing) and to enhance flavor development. It's also wise to cover your dough while it proofs to maintain warmth; using a non-porous cover like plastic wrap is preferable to a towel.
A humid environment (over 80% relative humidity) is beneficial for proofing, as it helps prevent the dough from drying out. If your kitchen is dry, some bakers opt to preheat their oven, place a pan of hot water inside, turn it off, and then proof the bread in the warm, closed oven.
Regarding proofing duration, there isn't a one-size-fits-all answer. As a general guideline, if you're proofing in a warm area, expect it to take between one to four hours (with longer proofing times being better for sourdough). In the refrigerator, proofing can take anywhere from eight to over 12 hours. Many factors influence this, including kitchen temperature, flour types, and dough moisture.
Recommended

Make Your Cake Look Like Cherry Blossom Trees Inside With A Simple Trick

Transform Store-Bought Pizza Dough Into Air Fryer Donuts In 3 Easy Steps
The Lace Hack For Easy, Yet Impressive, Cake Decorations
Ritz Cracker Thin Mints Taste Like The Real Thing And Only Require 2 Ingredients
Next up